Guide
Table of contents
Overview
This guide covers how to create and upload a graphic design for use in a Mailjoy postcard campaign. With Mailjoy, you can also use one of our free postcard templates in our easy to use self-service design tool.
Tip: If you're working with a graphic designer, send them this guide. They'll know what to do.
Mailer template
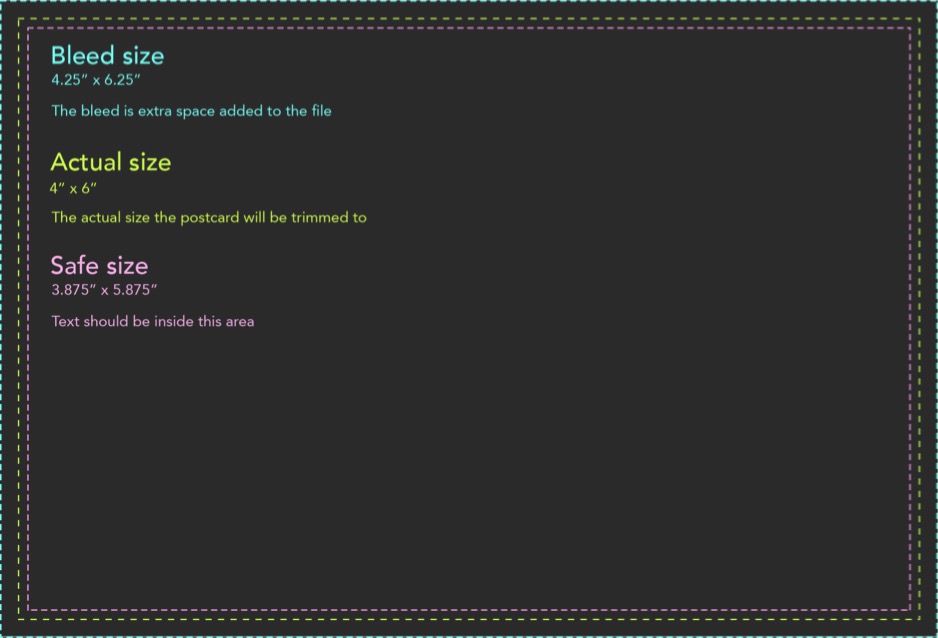
First, make sure you've downloaded the template if you haven't already. From there, you'll need to pick whether you'll be using a 4" x 6" or 11" x 6" sized mailer for your campaign. The download includes a Photoshop template (PSD) for both sizes. The templates include the layers of a sample design, as well an overlay layer to show you the boundaries of each size (explained below). In this guide, we'll look at a 4" x 6" template.
Key terms
- Bleed size - This is extra space that is added to the mailer to compensate for slight variations in where the printer separates the cards. Since your creatives will run edge to edge, the bleed is generally best as an image or border. Text should never reach this area.
- Actual size - This is the actual postcard once it's cut down to size.
- Safe size - To ensure no text is cut off, we cite a safe size so that the text doesn't run to the edge.
Front design


Back design
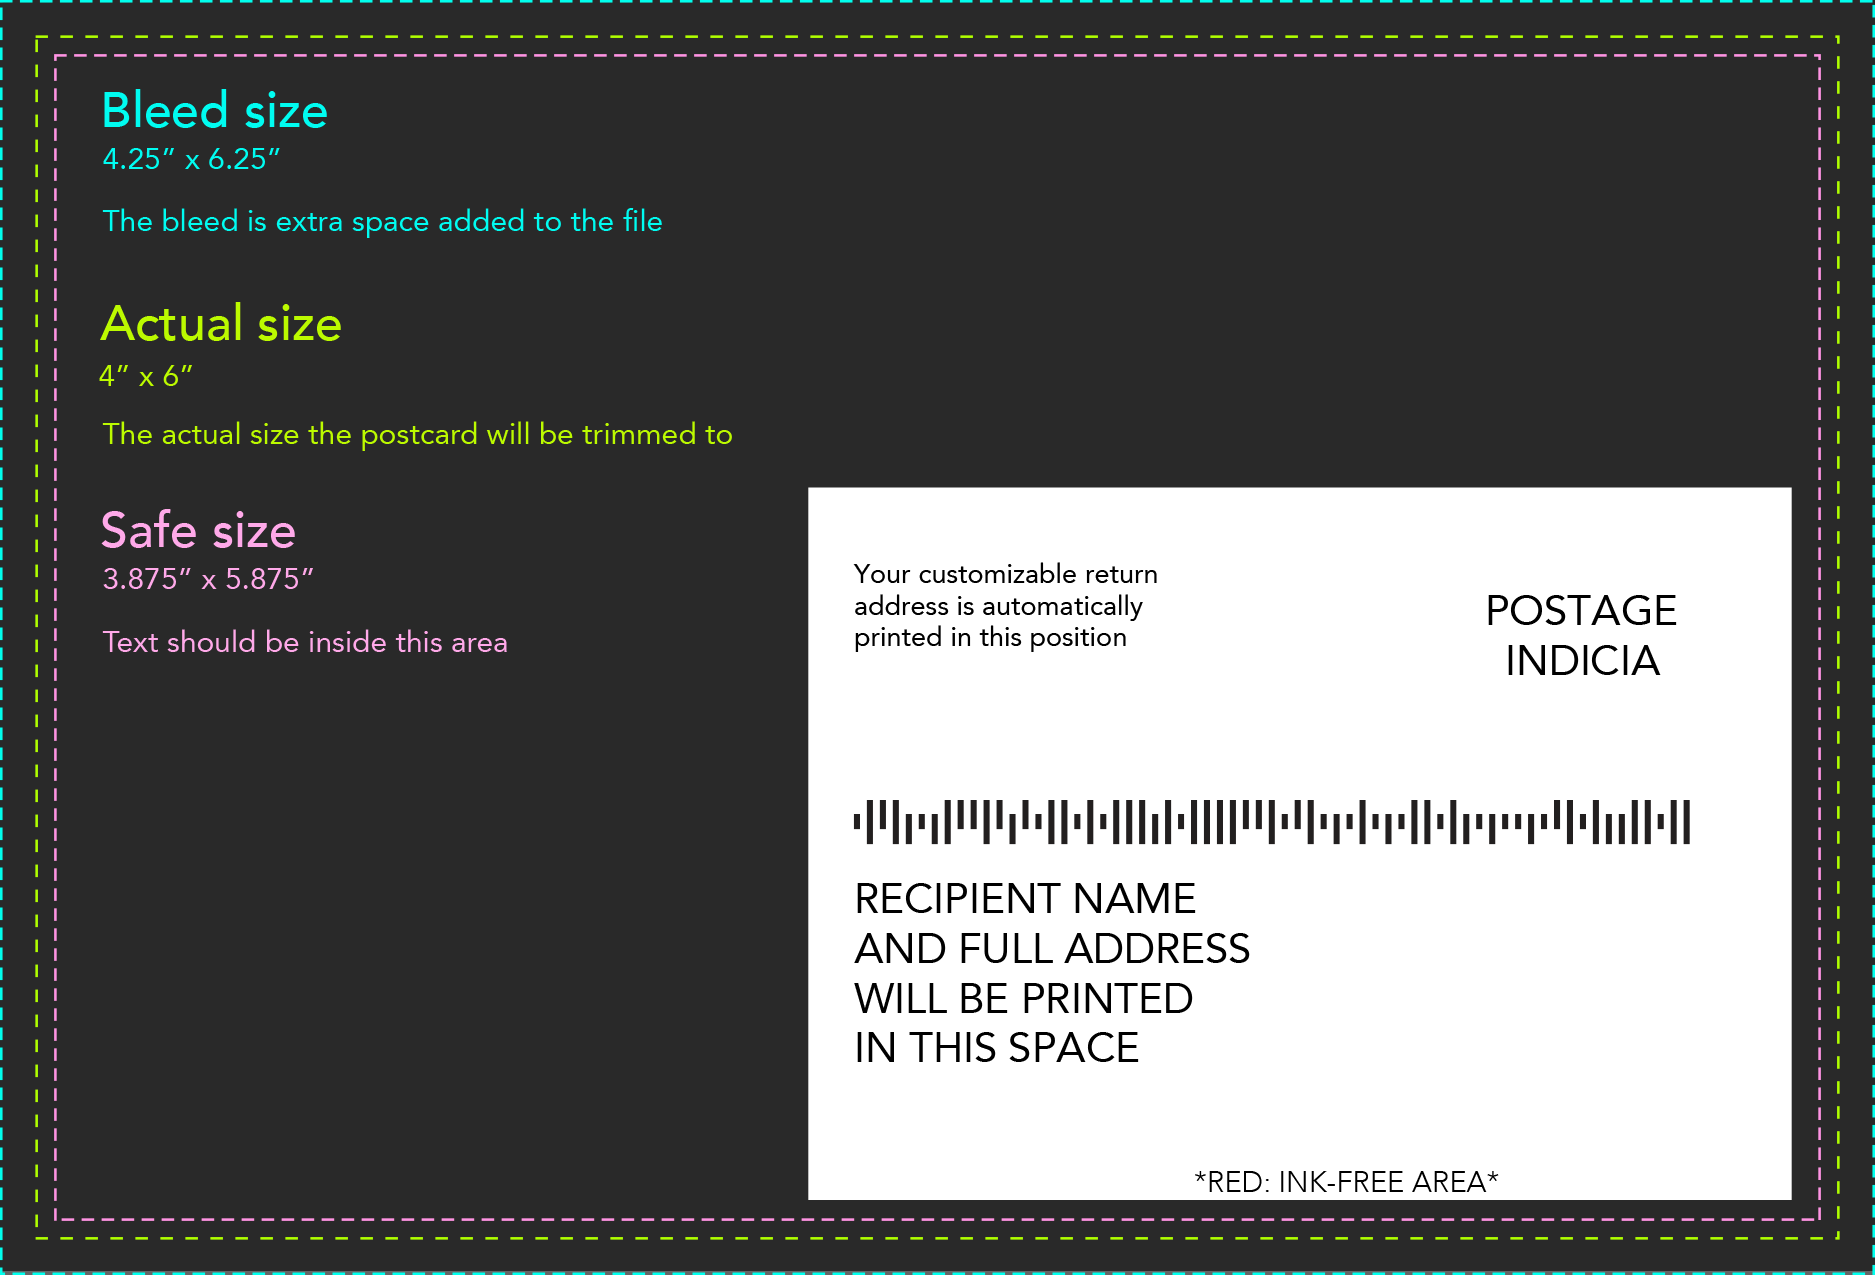
Unlike the front design where you have full design freedom, the back design consists of an ink-free area that is reserved for recipient information, postage, and a tracking barcode. This section is fixed so you'll have to design around it.


Uploading a design
To upload a design, you'll need to select Upload a design as your desired template. You can find this template under the Other category in template selection. In this template, the majority of the functionality of our self-service design tool is not available. This means all elements of your design only come from what you upload. Remember: Each side of a postcard can use a different template.
Dimensions
| 4" x 6" | 11" x 6" | |
| Bleed size | 4.25" x 6.25" | 11.25" x 6.25" |
| Actual size | 4" x 6" | 11" x 6" |
| Safe size | 3.875" x 5.875" | 10.875" x 5.875" |
Exporting
To ensure the highest quality print, you'll need to export at 300DPI. For example, for a photo that is desired to be 1in x 1in on the final postcard, the image asset should be sized at 1in x 1in at 300DPI (which equates to 300px by 300px). You should export the design as a PNG or JPG at 100% quality.
| 4" x 6" | 11" x 6" | |
| 300DPI in pixels | 1875x1275 | 3375x1875 |
Best practices
- Text embedded in images often isn't as sharp as text that is overlayed over an image. Consider using one of our pre-made themes with your image as the background, and your text on top of it.
- Use "Sharp" or "Crisp" text anti-aliasing (rather than "Smooth" or "Strong").
- Avoid the use of shadows (i.e. tight gradients). Sharper edges will print much better.
